In this post we are going to create SharePoint Provider Hosted Add-in.
Provider Hosted Apps are simply a SharePoint app where the code in your app runs in a space you provide. I am going to use ASP.Net Web Forms application as APP.
Steps to create Provider Hosted APP:
- Create Developer Site Collection
- Create and Export Certificate
- Set up trusted security token
- Create Issuer ID
- Create Client ID
- Create SharePoint Provider Hosted APP
- CRUD Operation Using SharePoint Provide Hosted APP
Create Developer Site Collection
Navigate to SharePoint Central Administration and Create a Site collection with template Developer Site.

Once site is created, it will appear as per below image:

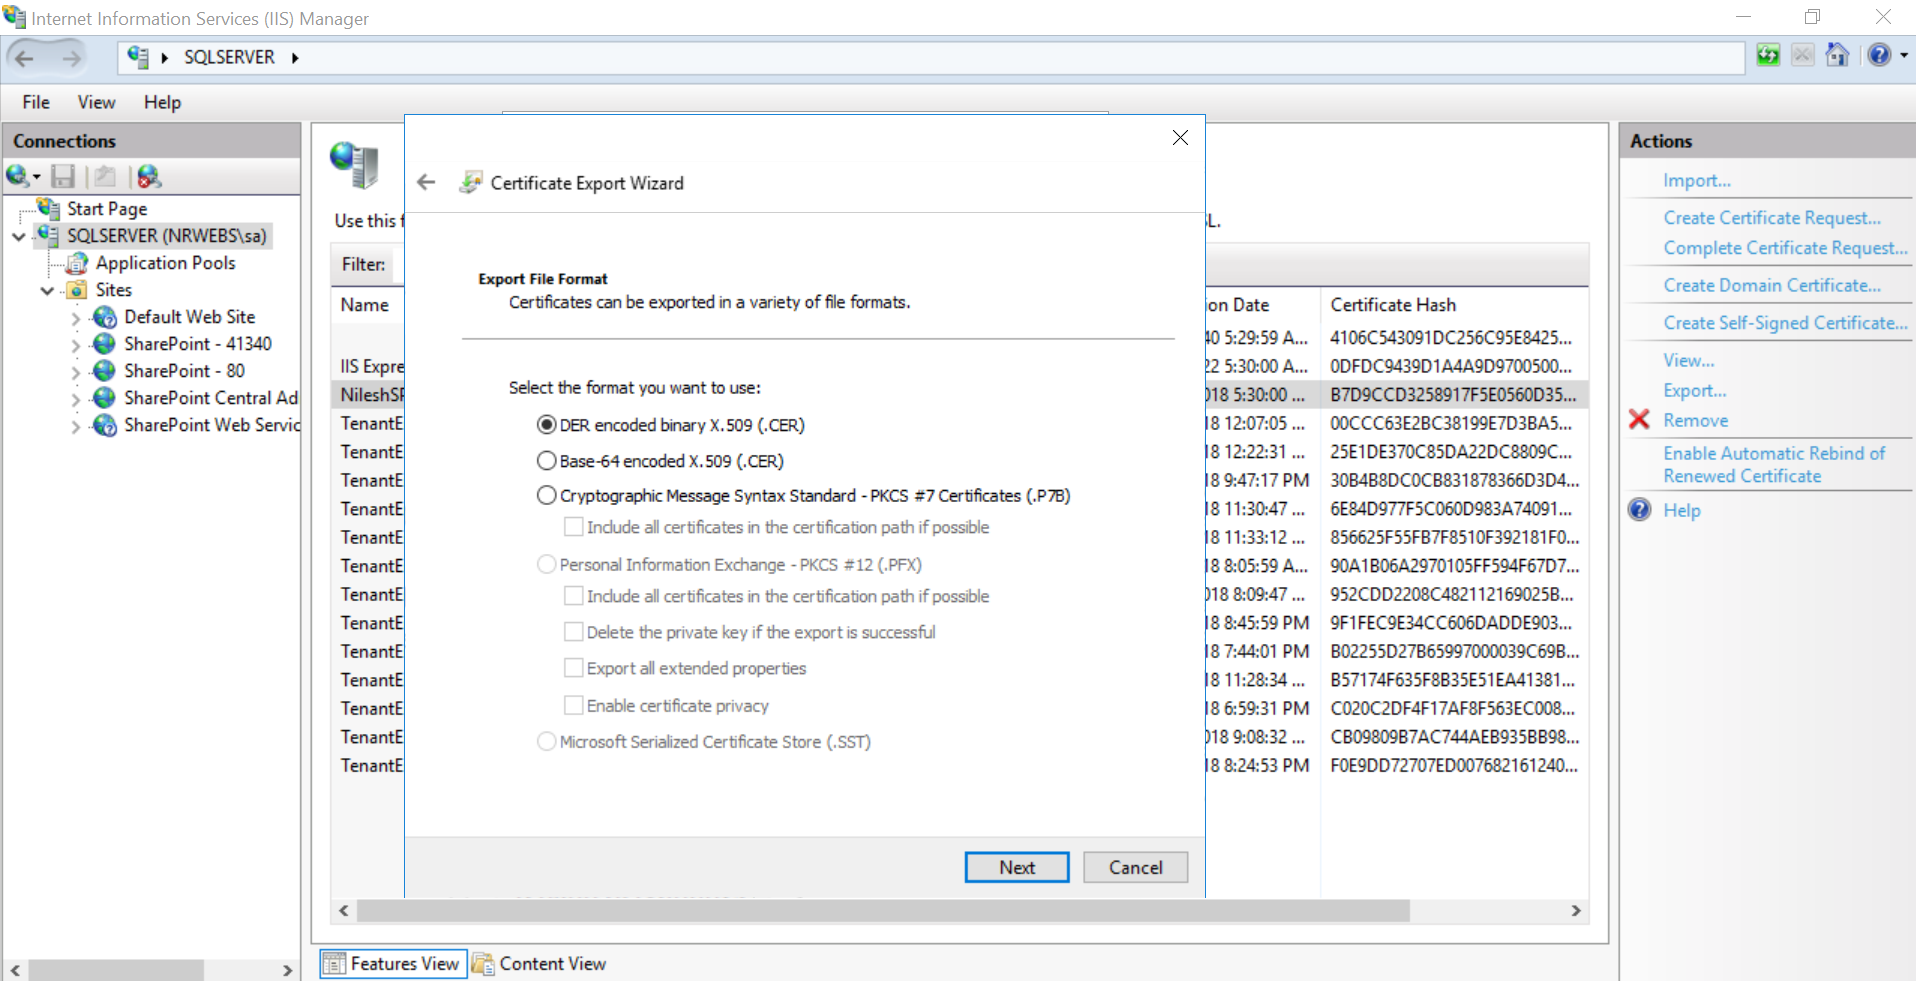
Create and Export Certificate
Now Next step is to establish trust. A trust is necessary due to the fact that the provider-hosted app is hosted outside SharePoint in a separate web application.
Primary requirement to establish Trust is having a Certificate. I have already created separate post regarding create and export process of Certificate you may check here.
Set up trusted security token
To establish Trust, first thing, we need to do is to get ISSUER ID.
Create GUID using Visual Studio which needs to be added in PowerShell Script.
GUID: e9fe114f-3406-400d-bd22-50f077a8f17f
Note that GUID must be in Lowercase.
Create Folder on location: “C:\output” which is going to store output file of PowerShell Scrip
Create Issuer ID
Open SharePoint Management Shell and Run Issuer ID Script
PowerShell Script for Issuer ID:
Add-PSSnapin "Microsoft.SharePoint.PowerShell"

$issuerID = "e9fe114f-3406-400d-bd22-50f077a8f17f"

$targetSiteUrl = "http://sqlserver:3333"

$targetSite = Get-SPSite $targetSiteUrl

$realm = Get-SPAuthenticationRealm -ServiceContext $targetSite

$registeredIssuerName = $issuerID + '@' + $realm

$publicCertificatePath = "C:\Certificate\NileshSPDemoCertificate.cer"

$publicCertificate = Get-PfxCertificate $publicCertificatePath

Write-Host "Create Security token issuer"

$secureTokenIssuer = New-SPTrustedSecurityTokenIssuer -Name $issuerID -RegisteredIssuerName $registeredIssuerName -Certificate $publicCertificate -IsTrustBroker

$secureTokenIssuer | select *

$secureTokenIssuer | select * | Out-File -FilePath "c:\output\SecureTokenIssuer.txt"

#Turn off the HTTPS requirement for OAuth during development

$serviceConfig = Get-SPSecurityTokenServiceConfig

$serviceConfig.AllowOAuthOverHttp = $true

$serviceConfig.Update()

Write-Host "All done..."
Create Client ID
Now Next Step is to Create Client ID by mapping into APP Principal
PowerShell Script for Client ID: fee415ed-6977-4c3c-b5d0-a06682719fb7
Add-PSSnapin "Microsoft.SharePoint.PowerShell"

# set intialization values for new app principal

$appDisplayName = "EMployeeManagement"

$clientID = "fee415ed-6977-4c3c-b5d0-a06682719fb7"

$targetSiteUrl = "http://sqlserver:3333"

$targetSite = Get-SPSite $targetSiteUrl

$realm = Get-SPAuthenticationRealm -ServiceContext $targetSite

$fullAppPrincipalIdentifier = $clientID + '@' + $realm

Write-Host "Registering new app principal"

$registeredAppPrincipal = Register-SPAppPrincipal -NameIdentifier $fullAppPrincipalIdentifier -Site $targetSite.RootWeb -DisplayName $AppDisplayName

$registeredAppPrincipal | select * | Format-List

$registeredAppPrincipal | select * | Format-List | Out-File -FilePath "c:\output\ClientID.txt"

Write-Host "Registration Completed"

#Get-SpAppPrincipal -?
Remember or note down Client ID as we need to enter in Application Configuration.
Once Issuer ID and Cline ID Created and configured to use Certificate next step is to create Provider Hosted APP.
Create SharePoint Provider Hosted APP
Open Visual Sudio and create a project of type SharePoint Add-in

Click OK

Select Developer Site and Select Provider-Hosted Add-in Type
Click Next

Select Target Version I am using SharePoint 2016. You may choose as per your environment.
Click Next

Select Project Type : Asp.Net Web Forms Application. Click Next.

Here you need to select Certificate which was exported and having PFX key.
Make sure that you enter correct password for certificate and Issuer Id (GUID which was generated and associated with certificate.). Click Finish.

It will create SharePoint Hosted APP as shown above image.
I have added single line in Default Page

AppManifest.xml file of APP is as below.

With AppManifest.xml We can change App Icon and Start Page.
I have changed APP Icon. Make Sure that Icon size is 96 x 96 pixels.

Click on AppManifest.xml and Navigate to View Code

You may find below code in AppManifest.xml

AppManifest.xml contains user rights permission on app to be run or executed. Also it contains client id.
To add user permission navigate to AppManifest.xml ==>Permissions Tab. Give appropriate rights as per requirement .

Add Client ID in RemoteWebApplication tag.
Complete AppManifest.xml will look below image.

Code For AppManifest.xml:
<?xml version="1.0" encoding="utf-8" ?>
<!--Created:cb85b80c-f585-40ff-8bfc-12ff4d0e34a9-->
<App xmlns="http://schemas.microsoft.com/sharepoint/2012/app/manifest"
 Name="EmployeeManagementAPP"
 ProductID="{47f6010d-e511-42d7-8210-49ca99f1bfd7}"
 Version="1.0.0.0"
 SharePointMinVersion="16.0.0.0"
>
 <Properties>
 <Title>EmployeeManagementAPP</Title>
 <StartPage>~remoteAppUrl/Pages/Default.aspx?{StandardTokens}</StartPage>
 </Properties>

 <AppPrincipal>
 <RemoteWebApplication ClientId="fee415ed-6977-4c3c-b5d0-a06682719fb7" />
 </AppPrincipal>
 <AppPermissionRequests>
 <AppPermissionRequest Scope="http://sharepoint/content/sitecollection/web" Right="FullControl" />
 <AppPermissionRequest Scope="http://sharepoint/taxonomy" Right="Write" />
 <AppPermissionRequest Scope="http://sharepoint/content/sitecollection" Right="FullControl" />
 </AppPermissionRequests>
</App>
Now Navigate to EmployeeManagementAPPWeb’s Web.config file section

Add below code in appSettings section
<appSettings>
<add key="webpages:Version" value="3.0.0.0" />
<add key="webpages:Enabled" value="false" />
<add key="ClientValidationEnabled" value="true" />
<add key="UnobtrusiveJavaScriptEnabled" value="true" />
<add key="ClientId" value="fee415ed-6977-4c3c-b5d0-a06682719fb7" />
<add key="ClientSigningCertificatePath" value="C:\Certificate\Export\NileshSPDemoCertificateExported.pfx" />
<add key="ClientSigningCertificatePassword" value="admin@123" />
<add key="IssuerId" value="e9fe114f-3406-400d-bd22-50f077a8f17f" />
</appSettings>
Also add location section
<location path="FederationMetadata">
<system.web>
<authorization>
<allow users="*" />
</authorization>
</system.web>
</location>
Web.config File Location Section

Web.Config File
<?xml version="1.0" encoding="utf-8"?>
<!--
For more information on how to configure your ASP.NET application, please visit
http://go.microsoft.com/fwlink/?LinkId=169433
-->
<configuration>
<location path="FederationMetadata">
<system.web>
<authorization>
<allow users="*" />
</authorization>
</system.web>
</location>
<system.web>
<compilation debug="true" targetFramework="4.5"/>
<httpRuntime targetFramework="4.5"/>
<authorization>
<deny users="?" />
</authorization>
</system.web>
<system.codedom>
<compilers>
<compiler language="c#;cs;csharp" extension=".cs"
type="Microsoft.CodeDom.Providers.DotNetCompilerPlatform.CSharpCodeProvider, Microsoft.CodeDom.Providers.DotNetCompilerPlatform, Version=1.0.0.0, Culture=neutral, PublicKeyToken=31bf3856ad364e35"
warningLevel="4" compilerOptions="/langversion:6 /nowarn:1659;1699;1701"/>
<compiler language="vb;vbs;visualbasic;vbscript" extension=".vb"
type="Microsoft.CodeDom.Providers.DotNetCompilerPlatform.VBCodeProvider, Microsoft.CodeDom.Providers.DotNetCompilerPlatform, Version=1.0.0.0, Culture=neutral, PublicKeyToken=31bf3856ad364e35"
warningLevel="4" compilerOptions="/langversion:14 /nowarn:41008 /define:_MYTYPE=\"Web\" /optionInfer+"/>
</compilers>
</system.codedom>
<appSettings>
<add key="webpages:Version" value="3.0.0.0" />
<add key="webpages:Enabled" value="false" />
<add key="ClientValidationEnabled" value="true" />
<add key="UnobtrusiveJavaScriptEnabled" value="true" />
<add key="ClientId" value="fee415ed-6977-4c3c-b5d0-a06682719fb7" />
<add key="ClientSigningCertificatePath" value="C:\Certificate\Export\NileshSPDemoCertificateExported.pfx" />
<add key="ClientSigningCertificatePassword" value="admin@123" />
<add key="IssuerId" value="e9fe114f-3406-400d-bd22-50f077a8f17f" />
</appSettings>
<system.serviceModel>
<bindings>
<basicHttpBinding>
<!--Used by SharePoint Add-in-->
<binding name="secureBinding">
<security mode="Transport" />
</binding>
</basicHttpBinding>
</bindings>
<protocolMapping>
<add binding="basicHttpBinding" scheme="https" bindingConfiguration="secureBinding" />
</protocolMapping>
</system.serviceModel>
</configuration>
Now Navigate to EmployeeManagementAPPWeb’s Project’s Property -> Web Section

Click On Create Virtual Directory button

It will create Virtual Directory.
Navigate to EmployeeManagementAPPWeb’s Property

Set properties as shown in above image.
Now everything looks great and we are able to deploy application.
Click on Start it will deploy application.

After app deployment you will see below App Permission Page

Click on Trust It and it will open an APP as show below

CRUD Operation Using SharePoint Provide Hosted APP